Firebase Integration
a) Create a Firebase Account
Create a Firebase account and then gain access to your own Firebase Console. A Firebase account can host multiple Firebase Projects that can host multiple mobile apps.
b) Configure a Firebase Project
Create a mobile app project in Firebase for each app that you are planning to publish. If you are publishing to both iOS and Android, you will need to create separate apps in Firebase, since technically they are different apps.
If you want your Flutter app to run on both iOS and Android, then you need to create a different mobile app for each (in Firebase). Simply click on the “Add App” button.
After you select the platform (iOS or Android), you need to provide the app’s identifier. Depending on which Flutter template you’ve purchased. Find the correct identifier in the files you’ve downloaded
for Android, go to android/app/build.gradle and get the applicationId

for iOS, open the app in Xcode and locate the Bundle ID field in the project’s configuration
Once you have the bundle ID, just use it in Firebase, add your sha1 or sha256 key (For Mobile verification) and create the app.
Note:
Before you submit your app to the App Store or Google Play, you’ll need to update these bundle identifiers with your unique identifiers, since the app stores don’t allow duplicate application ids.
c) Enable Firebase Authentication
To enable Firebase Authentication, go to Firebase Console -> Authentication -> Sign-in Methods and enable the methods that you are going to support in your app. By default, our Flutter apps have integration with Email/Password, Phone, and Facebook.

For Facebook log-in, you’ll also need your Facebook App ID. You can add that later when you set up Facebook.
d) Enable Firebase Firestore
To allow the mobile app to read and write data to/from Firebase Firestore, set up the correct access permissions. To do that, just head over to Database -> Cloud Firestore and set the Rules for writes and reads to the public.
service cloud.firestore
{match/databases/}database},/documents {match/{document=**}, {allow read, write: if true;}, }, },
e) Enable Firebase Storage
If your mobile app needs access to Firebase Storage (e.g. for uploading photos and videos, for instance), you have to enable Firebase Storage, so that the functionality works properly. To enable it, just go to Storage in the left menu.
service cloud.firestore
{service firebase.storage {match /b/{bucket}/o {match /{allPaths=**} {allow read, write: if request.auth != null; } } }
f) Link Firebase Account to Your Mobile App
Once you’ve created the app, Firebase will generate a configuration file name(for android google-service.json and for ios GoogleService-Info.plist). You have to add this file to your Flutter app. This is how the Flutter app can use your own Firebase backend. To do that, just download the configuration file and replace the existing mock files:
iOS: Download the GoogleService-Info-plist file and override the
existing ios/NameOfApp/GoogleService-Info.plist file.

Android: Download the google-service.json file and replace the
existing android/app/google-service.json file.

Add those files in all three apps as mentioned.
If you already have an app in Firebase, you can find and download this configuration file in Firebase Console -> Project Settings.
Run your brand new Flutter template, the mobile app will use your own Firebase backend, as opposed to our default one. Make sure you add all the tables and the required data in your Firebase so that the app will have items to display (e.g. food categories, chat messages, etc.). To quickly test the Flutter firebase integration, try registering a new user and see if they show up in Firebase -> Authentication tab.
g) Enable SMS Phone Authentication
To enable SMS authentication with Firebase, there are a few things we need to configure, that will allow the app to send SMS to the users.
Enable Phone Authentication in Firebase In Firebase, go to Authentication -> Sign-in method -> Phone Authentication and check the Enable switch.

Push Notifications#
This app uses Google Cloud Messaging (within Firebase) to send push notifications to both iOS and Android devices.
Push notifications are enabled by default in all of our Flutter templates. However, they are set up to work with our staging Firebase project, so you’ll need to switch to your own project, similar to how you’ve done it for Firestore.
Setting Up Push Notifications with Your Own Firebase
To set them up with your own Firebase, all you need to do is to replace the Server Key of the lib/constants.dart file with your own.
a) In Firebase, go to Project Settings -> Cloud Messaging and copy the Server Key to clipboard


b) In the source code, go to lib/constants.dart and replace the Server Key (SERVER_KEY constant) with your own:
const SERVER_KEY = “YOUR_KEY_HERE”;

c) also place the key in file named FirebaseHelper.dart where sendFcmMessage method placed in that method replace text Enter Your Fcm Key with your own.

Code Documentation
sendNotification(String token, String title, String body) async {}
sendFcmMessage(String title, String message, String Token)
To identify all the places that trigger push notifications, simply search for this method in the project.
Facebook Setup#
To use facebook authentication register your app on Facebook Devloper Console Create an app using app id .After that open facebook dev console and navigate to Settings/basic there you will get App ID and App secret copy both value to clipboard. Now open firebase console and navigate to Authentication/ Sign-in method, click on edit icon and submit value in respective fields.
For Android:
- open file :\android\app\src\main\res\values\strings.xml
- Put app id at facebook_app_id and write “fb+app id” at fb_login_protocol_scheme.

For iOS:
- Open file: Foodie_Customer/ios/Runner/Info.plist
- Put app id at FacebookAppID and write “fb+app id” at CFBundleURLSchemes.

For Example your facebook id is 12345 then your fb_login_protocol_scheme and CFBundleURLSchemes will be fb12345.
Now facebook is set up.
Running on Android
Follow these simple steps to run Flutter templates on Android
Step 1:Plugin your Android device or open an emulator
Step 2:Open a Terminal window and run:
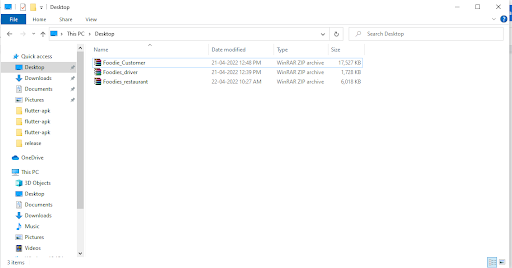
- 1. cd ~/path/to/template
- 2. flutter run
Replace ~/path/to/template with the correct path to the folder where you extracted the archive downloaded from our server. To make sure you are in the right folder, you can run “pwd” to see the current path. It must be the folder with the template, otherwise, the app won’t run.
> flutter run with this one flutter run --no-sound-null-safety
Plug in an Android device or emulator
In order to run Flutter apps on Android, you need an Android device or an emulator. If you have an Android phone or tablet, simply plug it in. You might need to enable USB debugging in Device Settings, under Developer Tools. Follow the Android Installation Guide.
Android emulators are bundled into Android Studio, so please install Android Studio, open it, go to Tools -> AVD Manager, and start an emulator of your choosing: You can also create new emulators of your own, with your own hardware requirements. Once you have an emulator up and running, proceed to the next step.
Run the Flutter App
For MacOS / UNIX simply run the two commands we described above:
- 1.
cd ~/path/to/template
- 2. flutter run
If you are using Flutter >= 2.0 or Dart version >=2.12 with Null Safety you might want to replace this command
> flutter run with this one flutter run –no-sound-null-safety
Visual Studio Code can be used that’s directly located at the right folder. With it you can simply run “flutter run” and the app will just start.
Note:
If you are using Flutter >= 2.0 or Dart version >=2.12 with Null Safety you might want to replace this command
> flutter run with this one flutter run –no-sound-null-safety
Running on iOS
You would need Mac OS and Xcode to run a Flutter app on iOS, but there’s no need for an Apple developer account or an iPhone – you can simply run an Xcode project on the iOS simulator.
If you are not new to iOS / Flutter development, and you already have the dev environment set up, simply do the following steps:
- Be sure you have the latest STABLE Xcode version (DO NOT USE XCODE BETA)
- Run “flutter run” in the root folder of the downloaded project:
1. flutter run
Note that if you are using Flutter >= 2.0 or Dart version >=2.12 with Null Safety you might want to run
1. flutter run –no-sound-null-safety
- If the project did not start, open the .xcworkspace file in Xcode, which got generated at the previous step (you can find it in the ios folder). Also, make sure a Pods folder got generated.
- In Xcode, select the iOS simulator/device and build and run the app (Command + R) If this is the first time you are running an iOS project on your machine, you need to set up your environment first. We recommend you follow the Flutter Guide.
- There are a few prerequisites that are iOS specific (you don’t need them for Android):
Follow these steps to get your app running on an iOS device or iOS simulator.
1. Run “flutter run” in the project root directory
if the “flutter run” command fails, you might want to run : > flutter run –no-sound-null-safety
2. Locate the ios folder and run “pod update“ This will install all the pods that the Flutter app depends on, such as Firebase Auth, Storage, etc. Make sure you have Cocoapods installed beforehand.
3. Open the .xcworkspace file in Xcode Simply double click on the file in the terminal (make sure you are in the ios folder).
4. Run Xcode project
Choose a simulator or device in Xcode then go to Product -> Run, or simply press Command + R. This will build and run the chat project in the selected device/simulator.